Your cart is currently empty!
Category: 3rd Class

Let us visit | Class 4 | Evs Textbook | Chapter10
Andhra Pradesh | APSCERT
Here are the answers to the “Improve Your Learning” section along with the questions:
I. Conceptual Understanding
1. Name some festivals that you celebrate in your village.
• Some festivals celebrated in my village include Pongal, Diwali, Ugadi, Sankranti, and Holi.
2. Name the national festivals you celebrate in your school.
• National festivals celebrated in my school include Republic Day (January 26), Independence Day (August 15), and Gandhi Jayanti (October 2).
3. What places would you like to visit?
• I would like to visit historical places like the Charminar, Taj Mahal, and Qutub Minar, as well as natural places like waterfalls, hill stations, and wildlife sanctuaries.
II. Questioning and Hypothesis
4. What questions will you ask your teacher to know about the purpose of a bird sanctuary?
• Some questions I would ask my teacher about a bird sanctuary are:
1. What is a bird sanctuary?
2. Why are birds protected in sanctuaries?
3. Can we visit a bird sanctuary?
4. How do birds from different countries come here?
5. How can we help in protecting birds?
III. Experiments and Field Observations
5. Visit the holy places in your village. Write your findings.
• After visiting the holy places in my village, I observed:
1. The temple/mosque/church is an important place for worship.
2. Many people visit these places for prayers and rituals.
3. Special festivals and ceremonies are held there.
4. People maintain cleanliness and follow traditions.
IV. Information Skills and Projects
6. Prepare a list of historical places in your surrounding villages/mandal.
• Some historical places in my surrounding villages/mandal are:
1. Kondapalli Fort
2. Amaravati Stupa
3. Lepakshi Temple
4. Golconda Fort
(I took help from my parents and elders to list these places.)
V. Drawing and Model Making
7. Draw on a chart representing festivals like a lamp for Diwali, a tree for Christmas, and a half moon for Ramzan.
• I can draw a chart with:
1. A lamp for Diwali
2. A Christmas tree for Christmas
3. A crescent moon for Ramzan
VI. Appreciation
8. Have you ever seen a Jatara? What makes you happy in the event?
• Yes, I have seen a Jatara in my village. I enjoy the vibrant atmosphere, the colorful decorations, folk performances, and the variety of food stalls. It is a joyful event where people come together to celebrate.
Lesson 11: This is the way | Class 3 | Evs Textbook | Solutions
APSCERT | ANDHRA PRADESH
Here are the answers to the “Improve Your Learning” section from the lesson This is the Way (Class 3 EVS):
I. Conceptual Understanding (Tell and Write)
1. Name the four directions.
• East
• West
• North
• South
2. What do you see in the four directions of your school?
Direction What You See In the East Playground In the West Temple In the North Road In the South Shops 3. What helps us to locate an address in our village or a city?
• Landmarks like schools, hospitals, temples, and post offices help in locating an address.
• Maps and GPS are also useful for finding locations.
II. Questioning
4. What questions would you ask your teacher to draw the map of your village by using symbols?
• What symbols should we use for roads, schools, and parks?
• How do we show rivers or lakes on the map?
• Can we mark important places like the post office and police station?
• How do we indicate the four directions on the map?
III. Experiments and Field Observations
5. Name some landmarks of your village and write to which side they are to your school.
Landmark Direction from School Temple East Bus Stop West Hospital North Market South IV. Information Skills – Project Work
6. Visit a nearby house and fill in the table given below with the observations.
Observation House 1 House 2 House 3 Main door direction East North West Tap / Borewell / Well direction South East West Open field space direction North West South Road direction West South East V. Drawing Pictures and Model Making
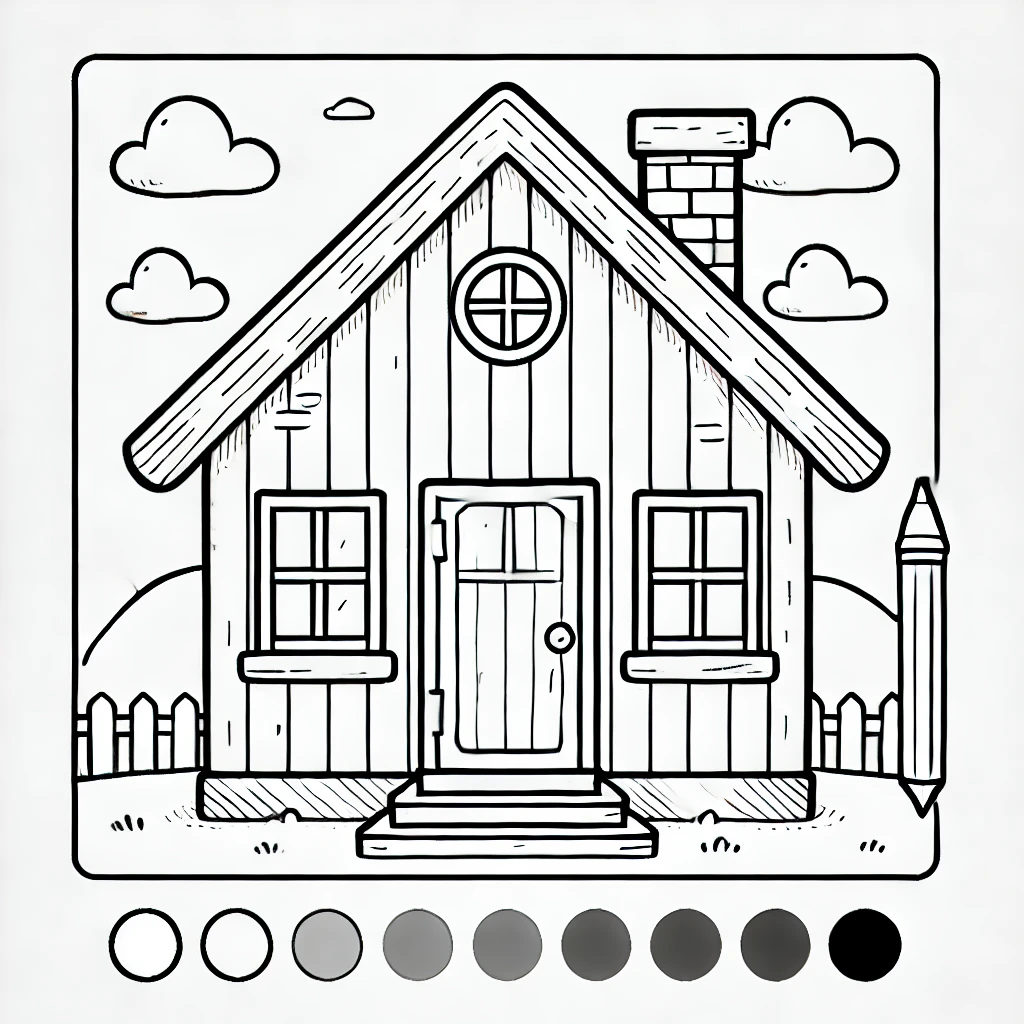
7. Draw your house. Then colour the North in red, South in blue, East in orange, and West in green.
8. Draw your school. Draw the school building and the main rooms in it.
VI. Appreciation
9. Have you ever helped someone by giving them the right directions to reach their destination? How did you feel?
• Yes, I once helped a visitor find their way to the hospital in my village.
• I felt happy and proud that I could assist someone.
10. How do you feel when you watch the sunrise or sunset?
• The sunrise makes me feel fresh and energetic.
• The sunset looks beautiful and makes me feel peaceful.
Lesson:10 Games and Recreation| Class 3 | Evs Textbook | Solutions
APSCERT | ANDHRA PRADESH
Here are the answers to the “Improve Your Learning” section from the lesson Games and Recreation (Class 3 EVS):
I. Conceptual Understanding (Tell and Write)
1. Write five outdoor games you like to play.
• Cricket
• Football
• Kabaddi
• Kho-Kho
• Badminton
2. Write the rules of any game you know. (Example: Kabaddi Rules)
• Each team consists of 7 players.
• The raider must say “Kabaddi, Kabaddi” continuously while attempting to touch opponents and return to their side.
• Defenders should stop the raider from returning to their side.
• The team with the most points at the end of the game wins.
II. Questioning
3. Name your friends who play daily at home.
My friends’ names are,
• Ramesh
• Priya
• Anil
• Sneha
III. Experiments and Field Observations
4. Play a local game mentioned in the textbook and write your experiences.
(Example: Playing Kho-Kho)
• I played Kho-Kho with my friends. It was exciting and fun.
• Running fast and touching players while escaping made the game challenging.
• I learned teamwork, patience, and how to think quickly during the game.
IV. Information Skills – Project Work
5. Ask your friends about the games they like and fill in the table.
Sl. No. Name of Friend Games He/She Likes 1 Ramesh Cricket 2 Priya Badminton 3 Anil Chess 4 Sneha Kho-Kho V. Drawing Pictures and Model Making
6. Prepare play items with clay, such as a ball, bat, tenni-coit, tennis racket, shuttlecock, etc., and display them in your classroom.
(Students can make these clay models as part of their activity.)
VI. Appreciation
7. Your friend won a prize at the school-level games on 15th August. He showed it to you. How do you feel or how would you appreciate him?
• I would feel very happy and proud of my friend.
• I would congratulate him and say, “Great job! You deserve this prize for your hard work and practice.”
• I would encourage him to keep playing and participating in more competitions.
lesson: 9 | Together with Everyone | Class 3 | Evs | Textbook
APSCERT | ANDHRA PRADESH
Here are the answers to the “Improve Your Learning” section from the lesson Together with Everyone (Class 3 EVS):
I. Conceptual Understanding
1. What is communication? How do you communicate with people who are far away?
• Communication is the process of sharing thoughts, ideas, or feelings with others.
• We communicate with people who are far away through phone calls, emails, text messages, letters, and video calls.
2. Give some examples of indirect communication.
• Television broadcasts, radio, emails, text messages, letters, and newspapers are examples of indirect communication.
3. Write different ways of non-verbal communication.
• Gestures (like waving hands), facial expressions (like smiling or frowning), body language (like nodding), and sign language.
4. Mention the ways of communication used in the past.
• Drumming, sending smoke signals, using pigeons to carry letters, human runners, and horse riders were used for communication in ancient times.
II. Questioning
5. What questions will you ask your teacher about sign language?
• How do deaf and dumb people learn sign language?
• Are there different sign languages in different countries?
• Can everyone learn sign language easily?
• How can we use sign language to communicate with hearing-impaired people?
III. Experiments and Field Observations
6. Observe pet animals in your surroundings and write how they communicate.
• Dogs: Wag their tails when happy, bark when alert or scared, lick to show affection.
• Cats: Purr when content, meow for attention, rub against people or objects to show affection.
• Birds: Chirp or sing when happy, flap wings or peck to express excitement or fear.
IV. Information Skills – Project Work
7. Collect information about indirect communication tools.
• Postcards and Letters: Used for written communication.
• Telephones and Mobile Phones: Used for voice communication over long distances.
• Emails and Text Messages: Digital means to send written messages quickly.
• Television and Radio: Broadcast information and entertainment to a large audience.
V. Drawing Pictures and Model Making
8. Draw the picture of four smilies used in non-verbal communication.
• 😀 (Happy)
• 😢 (Sad)
• 😡 (Angry)
• 😲 (Surprised)
VI. Appreciation
9. What excites you when you observe the hearing-impaired children communicating with each other?
• It is exciting to see how they use hand movements, facial expressions, and gestures to share their thoughts and feelings.
• It shows that communication is possible in many beautiful ways, even without words.
Let’s Travel Together | Class 3 | EVS | Lesson 8
APSCERT | ANDHRA PRADESH
Here are the answers to the “Improve your learning” section for the lesson “Let’s Travel Together”:
I. Conceptual Understanding
1. Which vehicles have you travelled by?
• Bus, car, auto, bicycle, and train.
2. Name the animals that are used for transportation.
• Horses, camels, donkeys, bullocks, and elephants.
3. Which vehicle moves without wheels?
• Boats and ships.
4. Give some examples of three-wheelers.
• Auto-rickshaw and e-rickshaw.
II. Questioning
5. Guess what will happen if there is no transport facility to your village.
• People will face difficulties in commuting for work, education, and medical emergencies. They will also struggle to transport goods and services.
III. Experiments and Field Observations
6. Write the uses of various vehicles you observe in your surroundings.
• Bus: Transporting passengers over long distances.
• Car: Personal travel and commuting.
• Truck: Carrying goods and materials.
• Bicycle: Short-distance travel and exercise.
• Auto-rickshaw: Local passenger transport.
IV. Information Skills – Project Work
7. Observe the vehicles that move in your street on any Sunday. Fill the table with particulars.
Name of the Vehicle No. of Vehicles Bicycle 10 Car 20 Bus 5 Auto 15 Motorcycle 30 Which vehicles are seen the most times?
Motorcycles.
Which vehicles are seen the least times?
Buses.
V. Drawing Pictures and Model Making
8. Draw the picture of a boat and colour it.
VI. Appreciation
9. We use animals for travel. How should be our attitude towards animals?
• We should treat animals with kindness, provide them with proper food, water, and rest, and avoid overloading them.
10. Do you like to travel by aeroplane? If so, what should you do?
• Yes, I like to travel by aeroplane. To do so, I need to buy a ticket and follow the safety rules during the journey.
Chapter: 7 | Shelter For All| Class:3 | EVS | Quiz | Lesson Plan
Here are the answers to “Improve Your Learning” for the lesson “Chapter: 7 | Shelter For all” along with a short quiz for the Curiosi students to test their knowledge and a perfect lesson plan for teachers to succeed in their class. Here you go.
APSCERT| ANDHRA PRADESH
StudentTeacher1. Conceptual Understanding
1. What is the difference between a Kutcha and a Pucca house?
• Kutcha House: Made of mud, straw, bamboo, or palm leaves. It is not very strong and temporary.
• Pucca House: Made of bricks, cement, iron, and concrete. It is strong and permanent.
2. Why do we need a house?
• We need a house to protect us from heat, cold, rain, dust, and wild animals. It provides shelter and safety.
3. What help can be given to the people who live in tents and pipes?
• Provide them with basic necessities like food, clothing, and temporary shelters.
• Help them find jobs to improve their living conditions.
• Government and local organizations can arrange housing schemes for them.
II. Questioning
4. Deepthi observed a beehive on a tree. She wants to know about the beehive. What question would she ask her teacher?
• “How do bees build their beehive, and what do they use it for?”
III. Experiments and Field Observations
5. Observe the different shelters of animals, birds, and insects and name them.
Animals:
• Dog: Kennel
• Cow: Shed
• Lion: Den
Birds:
• Sparrow: Nest
• Woodpecker: Tree hole
• Weaver Bird: Woven nest
Insects:
• Ants: Anthill
• Bees: Beehive
• Spiders: Spiderweb
IV. Information Skills – Project Work
6. Observe the roofs of houses in your surroundings and fill in the table:
S.No Type of the House Roof of the House 1 Kutcha house (hut) Slant 2 Pucca house (villa) Flat 3 Apartment Flat 4 Tiled house Slant V. Drawing Pictures and Model Making
7. Make a model of a hut with ice cream sticks or matchsticks.
VI. Appreciation
8. If you have a bird or a cat or a dog as a pet, how would you take care of it?
• I would give my pet food and water every day.
• Keep its shelter clean and comfortable.
• Take it to the vet for health checkups.
• Spend time playing with it to make it happy.
Lesson Plan: Shelter For All (Class 3 – Our World)
Subject: Environmental Studies (EVS) / Social Studies Topic: Shelter For All Grade Level: Class 3 Time Allotment:6 Periods (approx. 35-40 minutes each)
Learning Outcomes:
By the end of this lesson, pupils will be able to:
- Speak about the importance of shelters, identify the places of living in their neighbourhood and infer that shelter is a primary need to all living things.
- Identify different types of houses and find reasons for poor living conditions. Find out the diversity of shelters depending on climate.
- Understand that birds, animals and insects too need a shelter.
Materials Required:
- Textbook: “Shelter For All(E).pdf” (Class 3 – Our World)
- Chart paper, markers, crayons/color pencils
- Pictures/flashcards of different types of houses (caves, huts, tiled, pucca, apartments, tents, caravans)
- Pictures/flashcards of different animal homes (nests, burrows, dens, sheds, kennels, coops, stables, sties, folds, anthills, beehives, spider webs)
- Small models or pictures of different roof types (metal sheet, tiled, concrete, thatched)
- Ice cream sticks or matchsticks, glue (for hut model project)
- Whiteboard/Blackboard
Period-wise Breakdown:
Period 1: Importance of Shelter & Evolution of Houses
Objective: To understand why shelters are essential for all living things and trace the evolution of human dwellings.
Introduction (5 minutes):
- Begin with a warm greeting: “Good morning, everyone! Today, we’re going to talk about a very important place – our home! Why do we need a home?”
- “Close your eyes for a moment and imagine you are outside. What if it suddenly started raining heavily? Or the sun became very hot? Where would you go? Yes, a shelter protects us and keeps us safe and comfortable!”
Activity 1: Why Do We Need Houses? (15 minutes):
- Read aloud the introductory story about Raju and his grandfather observing a new house being built (Page 2).
- Discuss: “Why do we need a house?” (Page 2). Emphasize that a house protects us from heat, cold, rain, dust, wild animals, etc.
- Ask: “What kind of house do you live in? What do you like most about your home?”
Activity 2: Evolution of Houses (15 minutes):
- Read the section “Evolution of houses” (Page 4).
- Observe the flowchart showing the evolution of houses: Caves -> Thatched house -> Mud house -> Tiled House -> Pucca House -> Apartment (Page 4). Discuss how houses have changed over time, emphasizing the progression from simple to more complex structures.
- Elders talk (Page 4): “Talk to your grandparents and find out the kind of houses they lived in.” (Assign as observation homework). Encourage students to ask about the materials used and how it felt to live in those houses.
Closure (3-5 minutes):
- Summarize: “Today, we learned that a house is a basic need for protection, and we saw how houses have changed from caves to modern apartments!”
- Preview: “Next time, we’ll explore different types of houses based on materials and climate, and meet some people who live in them!”
- Homework: Ask students to draw their own house and write one sentence about why they like it. Also, complete the ‘Elders talk’ activity.
Period 2: Different Types of Houses & Their Factors
Objective: To identify various types of houses based on materials, climate, and economic conditions, and differentiate between temporary/permanent and kutcha/pucca houses.
Recap (5 minutes):
- “Good morning, architects! Who can tell me one way houses have changed from long ago to now? What kind of house did your grandparents live in? Great!”
Activity 1: Exploring Different Houses (20 minutes):
- Introduce “Different types of houses” (Page 4). Explain that people build houses depending on climate, materials available, economic condition, and land availability. To encourage deeper thinking, ask guiding questions like: ‘How does a very hot or very cold climate affect how a house is built?’ ‘Why might people in a forest use different materials than people in a city?’ ‘How does how much money a family has affect their house?’ ‘Why is it sometimes hard to find land to build a house?’
- Read about Chenchayya (Thatched house in forest), Raju (Hut), Mary (Tiled house), Vijay (Mud house) (Page 6).
- Read about Joseph (Stone house), Rajiya (Apartment), Rasool (Pucca house/villa), Sailu (Tent) (Page 8).
- Discuss each type of house, its materials, and the people who live there. Ask students to compare these houses to their own, highlighting similarities and differences. Use the pictures to prompt observations about the materials used for walls and roofs.
Activity 2: Temporary vs. Permanent & Kutcha vs. Pucca (10 minutes):
- Introduce Caravan: “It is a house on wheels. It can be driven from place to place.” (Page 10).
- Explain Temporary Houses: “Houses that keep changing locations and can be moved to other locations are called temporary houses.” Examples: Tents, Caravans. Discuss who might live in such houses (nomads, construction workers, military, circus performers).
- Explain Permanent Houses: “Houses that cannot be moved or taken to different locations are called permanent houses.” Examples: Pucca houses, Apartments.
- Introduce Kutcha and Pucca houses (Page 10):
- Kutcha houses: Made of mud and straw (huts). Emphasize they are less durable.
- Pucca houses: Made of bricks, sand, and iron (stronger). Emphasize they are more durable.
- Think and Discuss (Page 10): “Why are houses so different from one another?” (Relate to climate, materials, economic condition, and land availability). Encourage students to give examples from their own observations.
Closure (3-5 minutes):
- Summarize: “Today, we explored a wonderful variety of houses, from simple huts to grand apartments, and learned about temporary and permanent homes! We also understood why houses look different around the world.”
- Preview: “Tomorrow, we’ll look closely at the roofs of houses and discuss what makes a house comfortable, inside and out.”
- Homework: Ask students to draw a Kutcha house and a Pucca house, labeling their materials.
Period 3: Types of Roofs & Facilities in a House
Objective: To identify different types of roofs and understand their purpose, and to recognize various facilities found in houses.
Recap (5 minutes):
- “Hello, my house builders! Who can tell me the difference between a Kutcha house and a Pucca house? Can you name one temporary house and one permanent house? Excellent!”
Activity 1: Exploring Different Types of Roofs (15 minutes):
- Introduce “Different types of roofs” (Page 12). “The top portion of a house is called the roof.”
- Observe the pictures of various types of roofs: metal roofing sheet, tiled roof, concrete roof, thatched roof (Page 12).
- Discuss: “You noticed that the roofs of all the houses are not alike. Some are flat and some have a slope.” (Page 12).
- Ask: “Why do houses have sloped roofs?” (Page 12). Guide them to think about how sloped roofs help shed rain and snow quickly, preventing water from collecting and damaging the house.
Activity 2: ‘Let us Do’ – Roof Experiment (10 minutes):
- Let us Do (Page 14): Conduct the experiment with sheets and water.
- Sheet placed on the floor (flat).
- Sheet placed against a brick (slight slope).
- Sheet placed against two bricks (steeper slope).
- “In which of the above sheets does water flow down quickly? Why?” (Page 14). This demonstrates the function of sloped roofs.
- Discuss: “What will happen if the thatched house roof is flat like a building?” (It would not shed rain effectively, leading to water accumulation and damage).
Activity 3: Facilities in a House (10 minutes):
- Introduce “Facilities in a House” (Page 14).
- Read about Anusha’s house (two rooms) and Preethi’s family (single room).
- Activity (Page 14): “Imagine how do they live there. How is your house? What facilities are there in your house?” (Page 14). Encourage students to share about the rooms and amenities in their own homes.
- Activity (Page 16): “Visit your neighbour’s house and observe the facilities they have? A list of facilities is given in the table below. Put a tick mark ().” (Assign as homework for observation). Remind students to be polite and ask for permission before observing.
Closure (3-5 minutes):
- Summarize: “Today, we learned about different types of roofs and why their shape is important, and we also explored the various facilities that make a house a home!”
- Preview: “Tomorrow, we’ll talk about keeping our homes clean and think about people who don’t have permanent homes.”
- Homework: Ask students to draw a house that you like (Page 14). Complete the facilities table (Page 16).
Period 4: Neat & Tidy Homes & Homeless People
Objective: To understand the importance of keeping houses clean and to develop empathy for homeless people.
Recap (5 minutes):
- “Good morning, tidy troopers! Who can tell me one type of roof and why it’s shaped that way? What’s one facility that makes your house comfortable? Great!”
Activity 1: Keeping Our House Neat and Tidy (15 minutes):
- Introduce “Neat and tidy” (Page 16).
- Discuss: “Do you keep your house clean?” (Page 16).
- Ask: “Where do you keep your books, pens and pencils after studying?” “What would you do if you don’t have a dustbin at home?” (Page 16). Encourage practical solutions like using a temporary container or finding a designated spot.
- Emphasize: “Whatever the type a house might be… if we keep things in order, it will look neat and tidy. A clean house keeps us healthy.” (Page 16).
- Discuss: “What happens if you leave garbage around your house?” (Foul smell, mosquitoes, flies breed). “We should always throw garbage and dirt away from our house.” (Page 18).
Activity 2: Understanding Homeless People (15 minutes):
- Introduce “Homeless People” (Page 18).
- Read the story of Lakshman migrating to Visakhapatnam and living at the railway station and under a flyover bridge.
- Discuss: “Have you noticed people living under flyover bridges or in pipes?” (Page 18).
- Ask: “What are the reasons for them to live like that?” “How do they protect themselves from rain, cold, winds etc.?” “Why don’t some people have homes?” “What problems do they face?” “How do you feel when you see homeless people?” (Page 18). Facilitate a sensitive discussion, emphasizing empathy and understanding. Encourage students to think about the basic needs that are not met for homeless individuals.
Closure (3-5 minutes):
- Summarize: “Today, we learned the importance of keeping our homes clean and organized for our health. We also thought about people who don’t have homes and the challenges they face, reminding us to be kind and empathetic.”
- Preview: “Tomorrow, we’ll explore the fascinating homes of animals and birds!”
- Homework: Ask students to design their ideal tidy room or study space. They can draw it and label where everything would go to keep it neat and organized. This encourages positive design and planning.
Period 5: Homes of Animals & Birds (Part 1)
Objective: To identify various animal homes and understand why animals need shelter.
Recap (5 minutes):
- “Hello, caring citizens! Who can tell me one reason why it’s important to keep our houses clean? And how do you feel when you see someone without a home? Great!”
Activity 1: Why Do Animals Need Homes? (15 minutes):
- Introduce “Homes of Animals” (Page 20). “We have seen where people live. Have you ever thought of animal homes?”
- Ask: “Why do animals need homes?” (Page 20).
- Explain: “Homes keep animals safe from heat, cold, rain and enemies. They live in different types of shelter. Some animals live in the wild. Some live with us. A few animals build homes on their own.” (Page 20).
Activity 2: Exploring Animal Homes (15 minutes):
- Observe the picture of the homes of some animals (Page 20).
- Discuss examples:
- Wild animals: lions and bears live in caves/dens, rabbits and squirrels live in burrows.
- Domestic animals: horse in a stable, cow in a shed, dog in a kennel, hen in a coop, pig in a sty, sheep in a fold.
- Insects: ants in anthills, bees in beehives, spiders in webs, silkworms in cocoons.
- Discuss animals that live in water (fish, whales) and both land and water (frog, crocodile, turtle) (Page 22).
- Discuss animals like monkeys and elephants that wander in the forest (Page 22). While they don’t build fixed structures like humans or some other animals, their natural environment (trees, forests) serves as their shelter, protecting them from weather and predators.
Activity 3: True or False (5 minutes):
- Let us check (Page 22): “Say whether the given statements are true or false. Mark in the brackets provided.” Go through the statements (A horse is kept in a shed, A tiger lives in a cave, A fish lives on a tree, A turtle lives both in water and on land, An elephant and a giraffe lives in water) and have students mark them. Review answers as a class.
Closure (3-5 minutes):
- Summarize: “Today, we took a fascinating journey into the homes of animals, learning about their unique shelters and why they need them, just like us!”
- Preview: “Tomorrow, we’ll focus on bird nests and insect shelters, and then review everything we’ve learned about shelter for all!”
- Homework: Observe the different shelters of animals, birds and insects in your surroundings and name them (Page 30, point 5).
Period 6: Nests of Birds, Insects’ Shelters & Review
Objective: To understand how birds and insects build shelters and to review the entire lesson.
Recap (5 minutes):
- “Good morning, my animal architects! Who can name one animal and its home that we discussed yesterday? Fantastic!”
Activity 1: Nests of Birds (15 minutes):
- Introduce “Nests of Birds” (Page 24). “A bird’s home is called a nest. Birds build nests to lay eggs and raise their young ones.”
- Discuss materials used: twigs, straws, leaves, cotton.
- Observe pictures of different bird nests (Page 24): Sparrow (on trees/wooden beams), Woodpeckers (holes in tree trunks), Weaver birds (hanging nests with bottom opening).
- Ask: “Hey! Look at this bird! Can you tell what it is doing?” (Feeding its young ones).
Activity 2: Insects’ Shelters & Concern for Animals/Birds (10 minutes):
- Discuss: “Do insects also have a shelter?” (Page 24). Show pictures of beehive, spider web, silk moth cocoon (Page 26).
- Introduce “Concern for animals and birds” (Page 28).
- Read the story of Raju and Amala saving the bird’s nest (Page 28).
- Discuss: “How do you feel when you observe the above pictures?” (Page 28).
- Emphasize: “Just like you and me, birds and animals too want to live freely and enjoy their natural life.” (Page 28). Reinforce slogans: “Do not harm animals.”
Activity 3: Review & Project Work (10 minutes):
- Review “Key words” (Page 28): Shelter, Caravan, Homeless people, Kutcha house, Pucca house, Apartment, Boat house, Permanent house, Temporary house. Discuss each term briefly.
- Review “What we have learnt” (Page 28) to summarize main points:
- A house gives us shelter and protection.
- Different types of houses.
- Temporary houses for floods/cyclones, migrants.
- Birds and animals too have homes.
- Improve Your Learning (Page 30):
- Conceptual Understanding: “What is the difference between a Kutcha and a Pucca house?” “Why do we need a house?” “What help can be given to the people who live in tents and pipes?”
- Questioning: “Deepthi observed a beehive on a tree. She wants to know about the beehive. What question would she ask her teacher?”
- Project Work (Page 30):
- Information skills – Project work (point 6): “Observe the roofs of houses in your surroundings and fill in the given table: Type of the house (Flat/Slant).”
- Drawing pictures and model making (point 7): “Make a model of a hut with ice cream sticks or matchsticks.” (Assign as a creative project).
- Appreciation (Page 30, point 8): “If you have a bird or a cat or a dog as a pet, how would you take care of it?”
Closure (3-5 minutes):
- “Fantastic work throughout this lesson, my amazing learners! You’ve explored the world of shelters, from human homes to the fascinating homes of animals and insects. Remember, shelter is a basic need for all living things, and it’s our responsibility to respect and protect all forms of life!”
Assessment:
- Formative Assessment: Observe student participation in discussions, activities, and group work. Check their completed tables, drawings, and responses to questions.
- Summative Assessment: Review the “Improve Your Learning” questions and project work.
Differentiation:
- For advanced learners: Encourage them to research different types of houses in various climates (e.g., igloos, stilt houses) or investigate how animals adapt their shelters. They could also write a short story from the perspective of a homeless animal.
- For struggling learners: Provide simplified explanations and more visual aids. Focus on identifying major types of human and animal shelters. Use flashcards for matching homes to animals.
Cross-Curricular Connections:
- Language Arts: Writing descriptions of houses, animal homes, slogans.
- Art: Drawing different houses, animal homes, making models.
- Social Studies: Discussing different communities, reasons for migration, empathy for less fortunate.
- Science: Animal adaptations, ecosystems (briefly).
This lesson plan is designed to make learning about “Shelter For All” a comprehensive, engaging, and empathetic experience for Class 3 pupils, fostering an understanding of diverse living conditions and a sense of responsibility towards all living beings.
😜Test Your Knowledge👉
Plants around us | Chapter 2 | Class 3 | Textbook Solutions | Quiz | Lesson Plan
Here are the answers to “Improve Your Learning” for the lesson “Chapter 2: Plants around us” along with a short quiz for the Curiosi students to test their knowledge and a perfect lesson plan for teachers to succeed in their class. Here you go. #AP SCERT #Andhra Pradesh
StudentTeacherI. Conceptual Understanding
1. What are the parts of a plant?
• The main parts of a plant are roots, stem, leaves, flowers, and fruits.
2. How do roots help the plant?
• Roots fix the plant in the ground. They absorb water and nutrients from the soil and send them to the stem and other parts of the plant.
3. How does the stem help the plant?
• The stem carries water and nutrients from the roots to all parts of the plant. It also supports the plant.
II. Questioning and Hypothesis
4. Observe the houses of Sita and Lakshmi. What questions would you ask them regarding plants?
For Sita’s house:
• Why do you have so many plants in your house?
• Which plants do you grow, and why?
For Lakshmi’s house:
• Why don’t you have many plants around your house?
• Would you like to grow some plants in your house?
III. Experiments and Field Observations
5. Observe trees, shrubs, herbs, climbers, and creepers in your surroundings and name them.
• Examples:
• Trees: Mango, Neem
• Shrubs: Rose, Hibiscus
• Herbs: Tulsi, Coriander
• Climbers: Grapevine, Bitter gourd
• Creepers: Pumpkin, Watermelon
IV. Information Skills – Project Work
6. Collect some aromatic leaves in your surroundings and name them.
• Examples:
• Tulsi
• Pudina (Mint)
• Coriander
• Curry Leaves
V. Drawing Pictures and Model Making
7. Draw a tree which you find in your surroundings. Colour it.
(Draw and colour any tree they like, e.g., Mango or Neem.)
8. Colour the leaves.
(colour leaves using green and other natural shades.)
VI. Appreciation
9. How do you feel if you see someone cutting the branches of the trees around you? What will you do then?
• I would feel sad because trees are important for us. I will politely ask them not to harm the tree and explain its importance.
10. What will you do if you see the fallen leaves in your school ground?
• I will collect the fallen leaves and put them in a compost pit to make manure.
Lesson Plan: Plants Around Us (Class 3 – Our World)
Subject: Environmental Studies (EVS) / Science Topic: Plants Around Us Grade Level: Class 3 Time Allotment: 6 Periods (approx. 35-40 minutes each)
Learning Outcomes:
By the end of this lesson, pupils will be able to:
- Understand the need for plants and trees and speak about them.
- Identify the simple features of plants like shape, colour, texture, aroma of leaves, trunk and bark.
- Tell about the various uses of plants.
- Develop concern towards nature.
Materials Required:
- Textbook: “Plants Around Us” (Class 3 – Our World)
- Pictures/flashcards of different plant parts (root, stem, leaf, flower, fruit)
- Real examples of plants (e.g., a small potted plant, different types of leaves, a small branch with a thick stem if possible, a thin stem example like tulsi or a grass stalk)
- Chart paper, markers, crayons/color pencils
- Science notebook for drawing/tracing
- Lemon, mango, neem, tulsi, pudina, coriander leaves (for aroma activity)
- Dry leaves (for project work)
- Whiteboard/Blackboard
Period-wise Breakdown:
Period 1: Introduction to Plants & Their Main Parts (Roots & Stem)
Objective: To introduce the concept of plants and help students identify the main parts of a plant, focusing on the functions of roots and stems. (Learning Outcomes: Understand the need for plants, Identify simple features of plants, speak about them).
Introduction (5 minutes):
- Begin with a warm greeting: “Good morning, my little botanists! Today, we’re going to explore the amazing world of plants that surround us every day!”
- “Imagine a world without plants. What would it be like? (Guide them to think about food, air, beauty). Yes, plants are truly special!”
Activity 1: Storytelling & Discussion (15 minutes):
- Read aloud the story of Ramya’s birthday from the textbook (Page 26-28).
- Show the picture of the tomato plant and its parts (Page 28).
- Ask questions:
- “What gift did Ramya get?”
- “What question did Ramya ask her father about the plant?”
- “Can you identify the different parts of this plant?”
- Facilitate a short discussion about how plants take water.
Activity 2: Understanding Roots & Stems (15 minutes):
- Discuss the role of roots: “Roots are like anchors! They keep the plant fixed in the ground and absorb water and nutrients from the soil.”
- Discuss the role of stems: “Stems are like highways! They carry water and nutrients to all parts of the plant and help the plant stand tall.”
- Use a real plant example to show roots (if possible, or a clear diagram) and stem.
- Introduce the “Let us Do” activity (Page 28): ‘Collect roots from weeds or plants that have fallen. Do all the roots look alike? Discuss your observations with your friends.’ (Assign as observation homework).
Closure (3-5 minutes):
Summarize: “Today, we began our journey into the world of plants! We learned about their main parts – roots and stems – and their important jobs.”
Preview: “Next time, we’ll discover that not all stems are the same, and we’ll learn about different types of plants!”
Homework:
- Observe a plant in your home or garden and try to identify its roots, stem, leaves, flowers, and fruits (if any).
- If possible, collect a few small roots (e.g., from weeds) and observe them.
Period 2: Different Types of Stems & Plant Classification (Trees, Shrubs, Herbs)
Objective: To help students understand that stems can be different and to introduce the classification of plants into trees, shrubs, and herbs. (Learning Outcomes: Identify simple features like shape, colour, texture, trunk and bark, Speak about plants).
Recap (5 minutes):
- ‘Good morning, everyone! Let’s quickly recap! Can you show me with your hands how roots hold a plant firmly in the ground? And what important job does the stem do?’
Activity 1: Exploring Stem Differences (15 minutes):
- Refer to Ramya’s observation about the tomato plant’s thin, hairy stem (Page 30).
- Discuss “Think and Discuss” questions (Page 30): “Have you observed the stem of a neem plant? How is it different from a tomato plant?”
- Explain that stems can be soft/green, or brown/hard, thick or thin.
- Introduce the term ‘trunk’ for thick stems of trees, noting they are covered by bark.
- Show examples of thin stems (e.g., tulsi) and pictures of tree trunks.
Activity 2: Classifying Plants (15 minutes):
- Introduce Trees: “Big and strong plants with thick trunks are called trees.” Give examples like Banyan, Tamarind, Mango, Peepal, Neem.
- Introduce Shrubs: “Small plants with hard stems are called shrubs.” Give examples like Rose, Hibiscus.
- Introduce Herbs: “Very small plants with soft and green stems are called herbs.” Give examples like Tulsi, Wheat.
- “Let us Do” (Page 32): “Observe the plants in your surroundings and write them in the space given. One is done for you.” Guide students to fill the table for thin/thick stems.
Closure (3-5 minutes):
- ‘Great job today, everyone! We explored the amazing variety of stems and learned to classify plants as trees, shrubs, and herbs. Can you name one example of each? Tomorrow, we’ll discover even more plant types and begin our journey into the wonderful world of leaves!’
- Preview: “Tomorrow, we’ll meet even more types of plants and begin our fascinating journey into leaves!”
- Homework:
- Find an example of a tree, a shrub, and a herb in your surroundings and be ready to share.
- Complete the table on Page 32 about thin and thick stems.
Period 3: More Plant Classifications (Climbers & Creepers) & Introduction to Leaves
Objective: To introduce students to climbers and creepers, and to begin exploring the structure and function of leaves. (Learning Outcomes: Identify simple features like shape, colour, texture, aroma of leaves, Speak about plants).
Recap (5 minutes):
- ‘Hello, my plant explorers! Let’s see if you remember! Can you quickly point to something in the classroom that reminds you of a tree? How about a small shrub? And a tiny herb? Great!’
Activity 1: Climbers and Creepers (15 minutes):
- Introduce Climbers: “Plants that need support to grow are called climbers.” Give examples like Grapevine, Bitter gourd. Show pictures.
- Introduce Creepers: “Plants that creep on the ground are called creepers.” Give examples like Watermelon, Pumpkin. Show pictures.
- “Fill in the given table with some more examples” (Page 32). Facilitate a short class discussion to add more examples.
Activity 2: Understanding Leaves (15 minutes):
- Read the conversation between Ramya and her father about leaves (Page 34).
- “Why do plants have so many leaves?” “Because leaves make food for the plant!”
- Show the diagram of the parts of a leaf (Apex, Leaf Margin, Vein, Petiole).
- Discuss: “Leaves are the food factories of a plant. They prepare food using air, water, and sunlight.”
- Ask: “Have you observed leaves of different plants? Are all the leaves the same in size, shape, colour, and smell?”
Closure (3-5 minutes):
- ‘Fantastic work today, everyone! We added climbers and creepers to our plant knowledge and began to understand the magic of leaves as ‘food factories.’ Can you tell me one new thing you learned about leaves today? Next time, we’ll dive deeper into the amazing variety and uses of leaves!’
- Preview: “Get ready to discover how varied and useful leaves can be in our next class!” Homework:
- Find leaves from 2-3 different plants and observe their shape, size, and how they are attached to the stem.
Period 4: Types and Uses of Leaves
Objective: To explore the diversity of leaves and understand their various uses for humans and the environment. (Learning Outcomes: Identify simple features like shape, colour, texture, aroma of leaves, Tell about the various uses of plants).
Recap (5 minutes):
- ‘Good morning, curious minds! Let’s quickly remember: What are leaves called in the plant world? (Food factories!). Can you show me with your hands how a big banana leaf might look? Great!’
Activity 1: Diversity of Leaves (15 minutes):
- Show pictures of various leaves from the textbook (Page 34-36): Banana, Tamarind, Coconut, Coriander, Hibiscus, Croton, Tulsi, Papaya.
- Discuss differences in size, shape, colour, and smell as described (e.g., banana leaves are big, hibiscus leaves have saw-like margins, papaya leaves look like a palm).
- “Let us Do” (Page 36): ‘Collect a few leaves of lemon, mango, neem, tulsi, pudina and coriander. (Teacher supervision required for collecting/crushing). Gently crush the leaves and smell them. Do they smell the same? Discuss with your friends which ones have a strong aroma!’ (Do this as a hands-on activity in class).
Activity 2: Uses of Leaves (15 minutes):
- Discuss the question: “Do you know how leaves are useful to us?”
- Explain various uses:
- Eaten as food (coriander, curry leaves, drumstick leaves).
- Tea is made from tea leaves.
- Used in medicines (neem, tulsi).
- Used to make disposable plates/bowls (banana, banyan, sal).
- “Activity” (Page 36): “Collect some leaves and trace the shape in your notebook. Colour the pictures and name them.” (Assign as homework or class activity).
- Introduce “Let us Do – Make a leaf album” (Page 36-38). ‘Explain the process of painting and imprinting leaves. (Remind students to use poster colours carefully and to clean up afterwards, with adult supervision if needed).’ (Assign as a fun, long-term project).
Closure (3-5 minutes):
- ‘Excellent work today, everyone! We’ve seen how diverse leaves are and how many wonderful ways they help us, from food to medicine and even art! Can you name one new use of leaves you learned today? Tomorrow, we’ll discover how plants help our Earth and how we can help them back!’
- Preview: “Tomorrow, we’ll learn about how plants help us in even bigger ways and how we can help them back!”Homework:
- Begin collecting leaves for your leaf album or trace a few leaves in your notebook.
- Ask family members if they know of other ways leaves are used.
Period 5: Making Manure & Overall Benefits of Plants
Objective: To teach students about making manure from fallen leaves and to reinforce the overall importance of plants for life on Earth. (Learning Outcomes: Develop concern towards nature, Tell about the various uses of plants).
Recap (5 minutes):
- ‘Hello, my green friends! Let’s quickly remember: What was one surprising use of leaves we learned about yesterday? (Allow students to share). Fantastic!’
Activity 1: How to Make Manure (15 minutes):
- Discuss “Do You Know” (Page 38): “We use fallen leaves to make manure.”
- Explain the process of making compost: Digging a pit, adding fallen leaves and kitchen scraps, covering it, and letting it decompose into manure.
- Emphasize the benefit: “This manure helps plants grow healthy!”
- “Let us Do – Make your own kitchen garden” (Page 38): Discuss the idea of growing mint, coriander, etc.
Activity 2: Overall Benefits of Plants (15 minutes):
- Read Ramya and her father’s conversation about flowers, fruits, and seeds (Page 38).
- Discuss the question: “Do you know how a plant helps us?”
- Show and discuss the picture on Page 40, identifying various uses of plants (food, air, clothes, shelter, medicine, etc.).
- Explain the key environmental roles:
- Plants give us food.
- Provide fresh air (absorb carbon dioxide and release oxygen).
- Roots of big plants hold soil and prevent soil erosion.
- Emphasize the message on Page 42: “It is our responsibility to take care of plants and save the Earth.”
Activity 3: “Let us check” (5 minutes):
- Observe the picture on Page 40 and ask students to name as many uses of plants as they can.
Closure (3-5 minutes):
- ‘Wonderful work today, plant protectors! We learned about making manure and how plants are truly Earth’s superheroes, giving us food, fresh air, and protecting our soil. Can you give me a ‘thumbs up’ if you think plants are important? Tomorrow is our final review and project day!’
- Preview: “In our last class, we’ll review everything and work on some exciting projects!” Homework:
- Discuss with family how they dispose of kitchen waste and if they use compost.
- Think of one new way you can help take care of plants around you.
Period 6: Review, Key Words & Project Work
Objective: To review all concepts learned in the lesson and complete project-based activities. (Learning Outcomes: All previous outcomes reinforced).
Recap (5 minutes):
- ‘Good morning, my wonderful class! Today is our review day! To get started, can anyone share their favorite amazing fact about plants that we’ve learned so far?’
Activity 1: Key Words and What We Have Learnt (15 minutes):
- Go through the “Key words” section (Page 42): nutrients, veins, creatures, living beings, carbon dioxide, oxygen, erosion. Discuss each term briefly.
- Review “What we have learnt” (Page 42) to summarize main points:
- Parts of a plant and their functions (roots, stem, leaves).
- Different types of stems and plants.
- Leaves as food factories, absorbing CO2 and releasing O2.
- Uses of plants.
Activity 2: Improve Your Learning Questions (10 minutes):
- Discuss “Conceptual Understanding” questions (Page 42-44):
- “What are the parts of a plant?”
- “How does roots help the plant?”
- “How does stem help the plant?”
- Discuss “Questioning and Hypothesis” (Page 44): Observe Sita’s and Lakshmi’s houses and what questions they would ask about plants.
Activity 3: Project Work & Appreciation (10 minutes):
- Project Work (Page 38 & 44):
- “Make pictures of animals with dry leaves and paste them in your notebook.” (If students started, provide time to work or share. If not, explain clearly as a take-home project).
- “Observe trees, shurbs, herbs, climbers and creepers in your surroundings and name them.” (Discuss as a group).
- “Collect some aromatic leaves in your surroundings and name them.” (Discuss findings).
- “Draw a tree which you find in your surroundings. Colour it.” (Assign for creative expression).
- Appreciation (Page 44): Discuss questions like: “How do you feel if you see someone cutting the branches of the trees around you? What will you do then?” and “What will you do if you see the fallen leaves in your school ground?” This reinforces caring for nature.
Closure (3-5 minutes):
- ‘Fantastic work throughout this lesson, my little botanists! You are now plant experts and protectors! Remember, plants are vital for our Earth, and it’s our job to care for them just as they care for us. Let’s make a promise to always respect and protect the plants around us!’
Assessment:
- Formative Assessment: Observe student participation in discussions, hands-on activities, and group work. Check their completed tables, drawings, and leaf observations.
- Summative Assessment: Review the “Improve Your Learning” conceptual questions and project work.
Differentiation:
- For advanced learners: Encourage them to research a specific plant and its unique uses, or design their own small kitchen garden plan. They could also write a short story about a plant’s journey.
- For struggling learners: Provide additional visual aids (larger flashcards, simplified diagrams), offer more direct guidance during activities, and pair them with supportive peers. Focus on identifying the main parts and one key use for each plant type.
Cross-Curricular Connections:
- Language Arts: Encourage students to write short sentences about plant parts, uses, or draw and label plants.
- Art: Incorporate drawing, coloring, and craft activities (like the leaf tracing and dry leaf animal pictures).
- Math: Counting different types of plants observed, or comparing sizes of leaves.
- Environmental Education: Discussions on sustainability, reducing waste (manure), and conservation.
This lesson plan is designed to make learning about “Plants Around Us” a hands-on, engaging, and enriching experience for Class 3 pupils. By connecting concepts to their everyday lives and encouraging observation and appreciation, we can foster a lifelong love for nature!
👉Take a short Quiz to test your knowledge😀👍